How to Animate Static Images with Temvideo: 2026 Full Guide.
Step-by-step guide to turn static images into ad-ready videos with TemVideo AI. Learn Path 1 one-click enhancement, templates, precision controls, prompts, and export settings.

Welcome to the new era of visual storytelling.
In today’s short-form content ecosystem, static images often struggle to capture attention. With AI-powered animation tools, however, a single image can be transformed into a dynamic, engaging video asset — complete with motion, depth, emotion, and storytelling power.
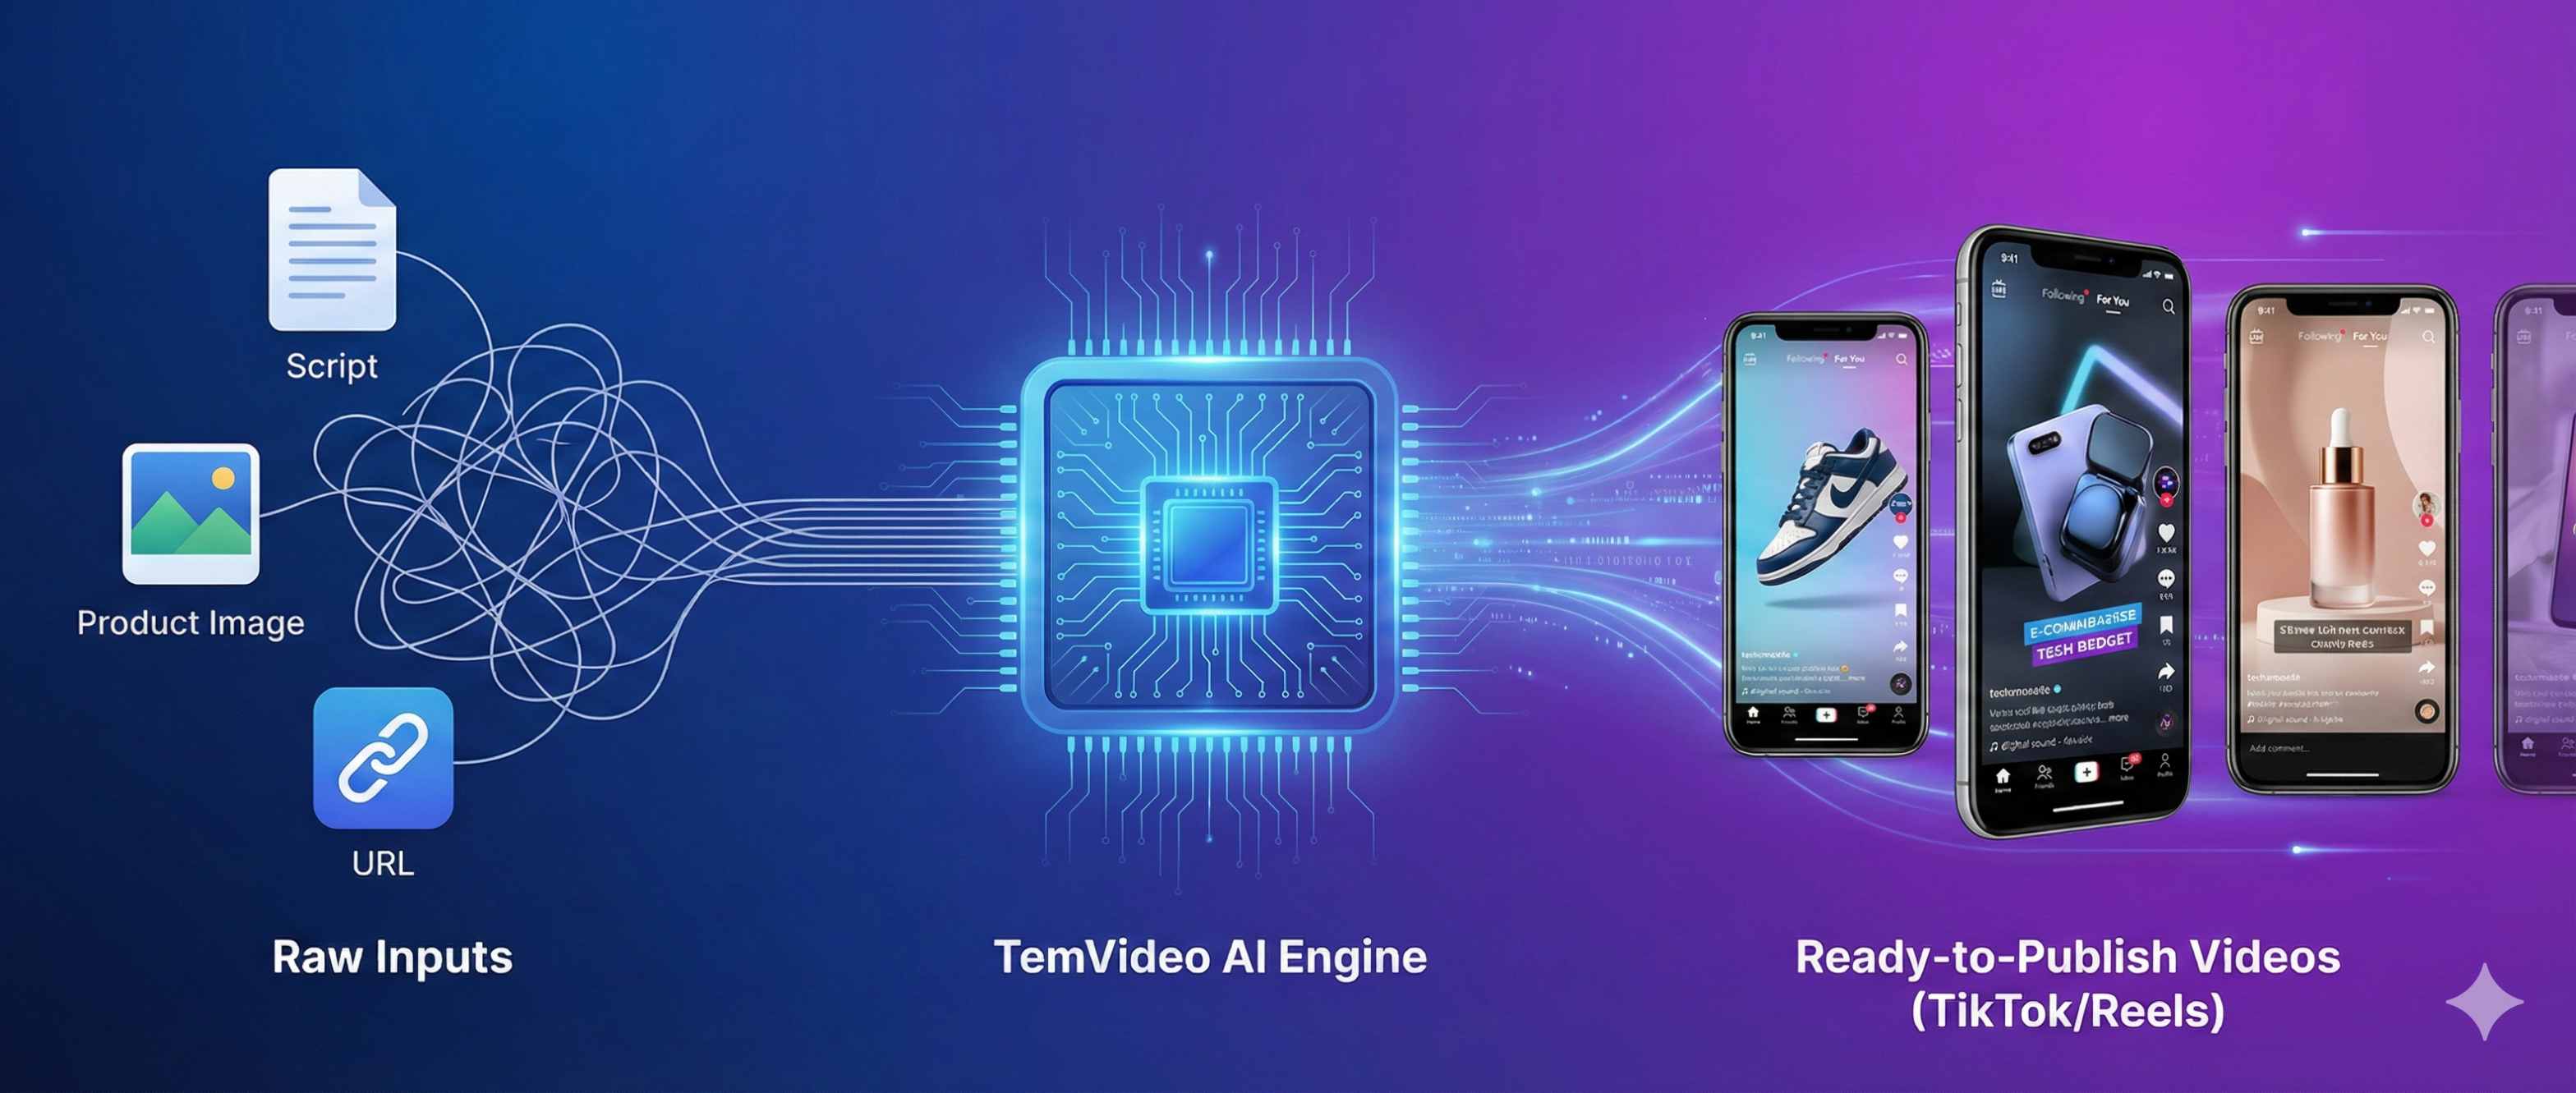
Here’s the exact workflow inside TemVideo AI:
Step 1: Choose Your Image Animation Path 🎬
Before generating your video, you first need to choose how you want your static image to be processed.
Our Image Animation feature offers three different creation paths, depending on your needs and how much control you want over the output.
Path 1 — Natural Language AI Generation 🤖
(Best for AI-powered enhancement & style transformation)
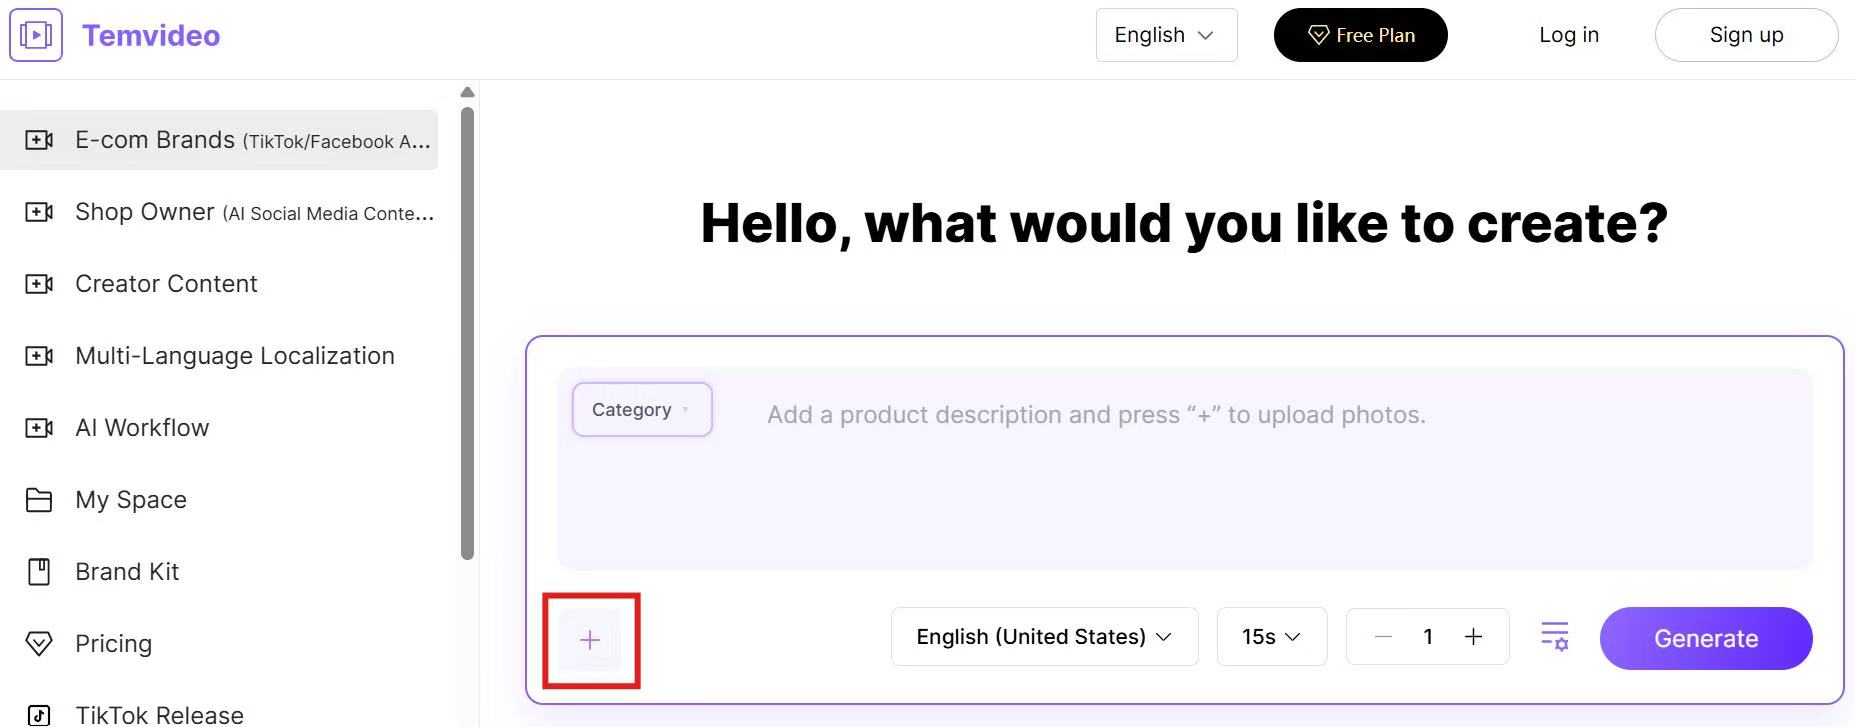
As shown on the homepage, simply click the “+” button to upload your static image and select this path.
How It Works:
The system analyzes your static image.
Our algorithm restructures the original image into multiple dynamic visual segments.
Based on:
Your selected product category
Your written prompt ✍️
The AI enhances your product visually and matches it with suitable scenes and environments.
The system automatically generates a video using our existing template library 🎥.
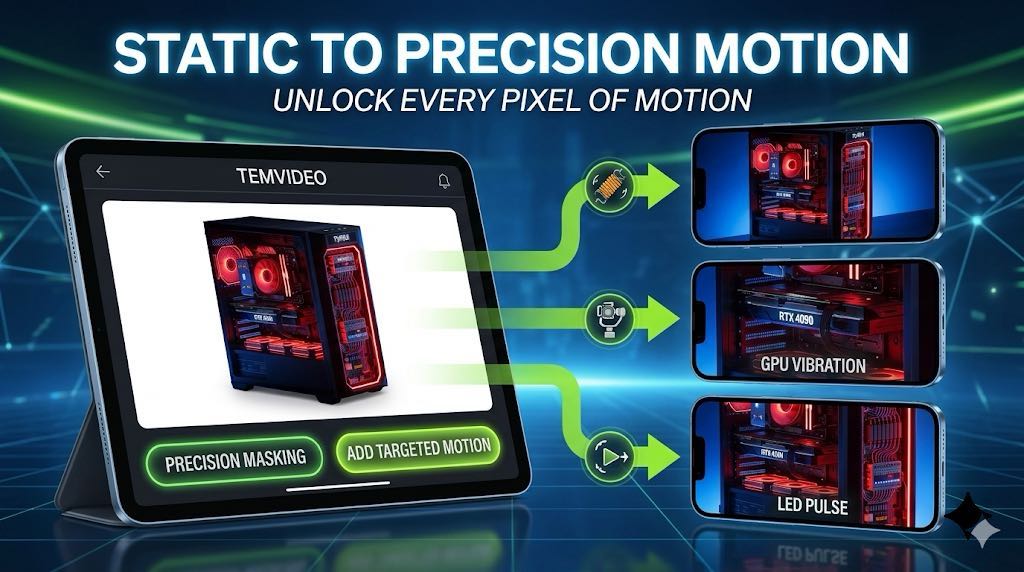
This path does not just animate the image — but AI-enhances, optimizes, and reimagines the visual presentation ✨.
Best For:
Users who are not fully satisfied with their original product images
Customers who want AI to upgrade styling and scene matching
Creators looking for a more “advertisement-level” transformation 🚀
🔔 Important Tip:
When using this path, make sure to turn on “Asset Optimization.”
This allows the AI to intelligently enhance lighting, texture, and composition before generating motion.

Path 2 — Template Library Generation 📚
(Best for preserving original image style)
If you already have high-quality product images and simply want to animate them without altering their visual style, choose Path 2.
How It Works:
Select a template from the existing template library.
Upload your product images.
The system animates the images while maintaining:
Original color tone
Composition
Product details
Overall style
Unlike Path 1, this path does not modify the core image aesthetics.
It focuses purely on adding dynamic motion and structure 🎞️.
Additional Feature:
In Path 2, you can also upload or select a virtual human image👩💼.
This is ideal for:
Fashion flat-lay clothing → AI model try-on videos 👗
Product showcase → Presenter-style marketing videos 🎤
Path 3 — Precision Image-to-Image Control 🎛️
(Best for advanced customization)
Path 3 provides a more granular and transparent workflow.
Here, you can:
Clearly view the image-to-image transformation for each uploaded image
Adjust how each individual image is processed
Fine-tune the voiceover for each segment 🎙️
Control pacing and narrative structure more precisely
This path is recommended for:
Professional marketers
Agencies
Users who want detailed control over speech and scene timing
Multi-scene storytelling projects 🎬
Step 2: Choose the Correct Product Category
After uploading your image, select the product category that best matches your item.
Available categories include:
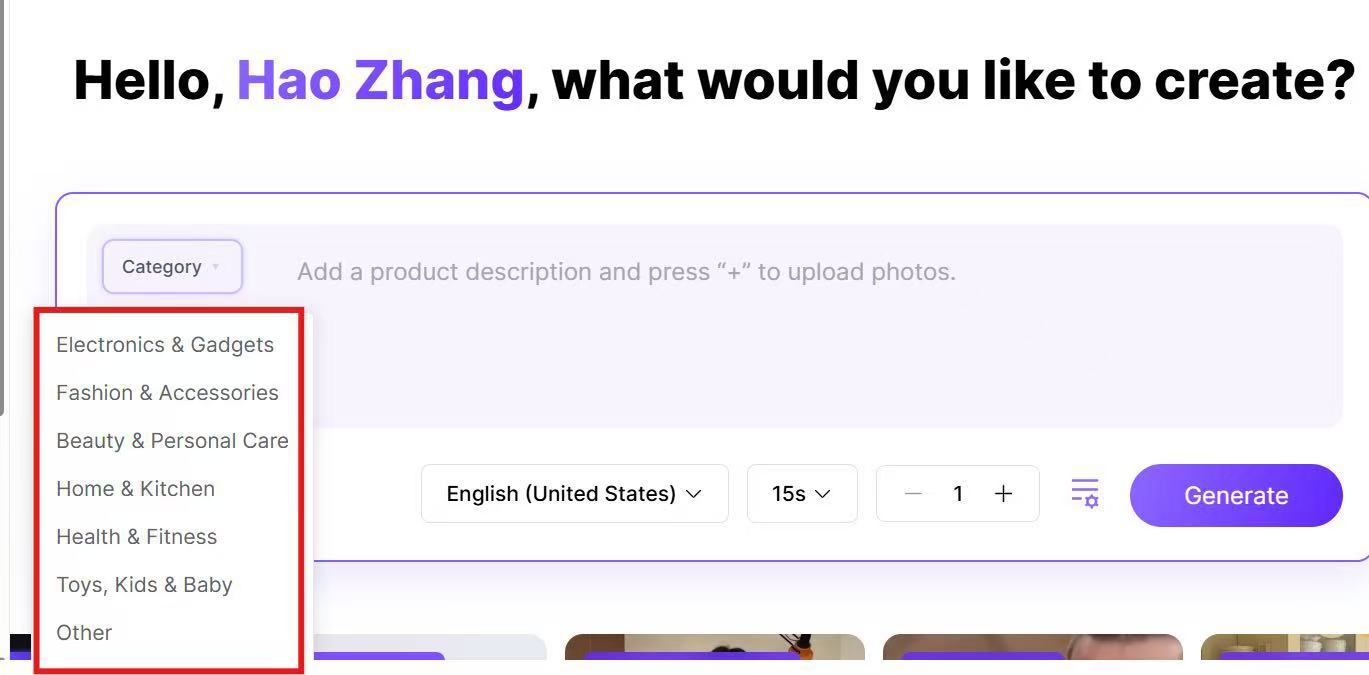
Why this matters:
Helps AI understand the product type more accurately
Match suitable scenes and environments
Ensures motion style fits your industry
Optimizes marketing tone
For example:
Electronics & Gadgets
The AI may generate clean, modern scenes with tech-style lighting, rotating product displays, and close-up feature highlights.
Fashion & Accessories
The AI can place your product on a virtual human model, create runway-style motion, or simulate lifestyle street shots.
Choosing the right category significantly improves output precision.
Step 3: Select Video Language, Duration & Quantity
Next, configure your output settings:
🌍 Video language (for voiceover & subtitles)
⏱ Video duration (from 15s to 120s)
🔁 Number of videos to generate
Generating multiple versions is helpful for:
A/B testing ads
Testing different platforms
Exploring creative variations
Step 4: Enter Your Creative Prompt
This is where you guide AI.
Describe what you want clearly and naturally.
Example prompt:
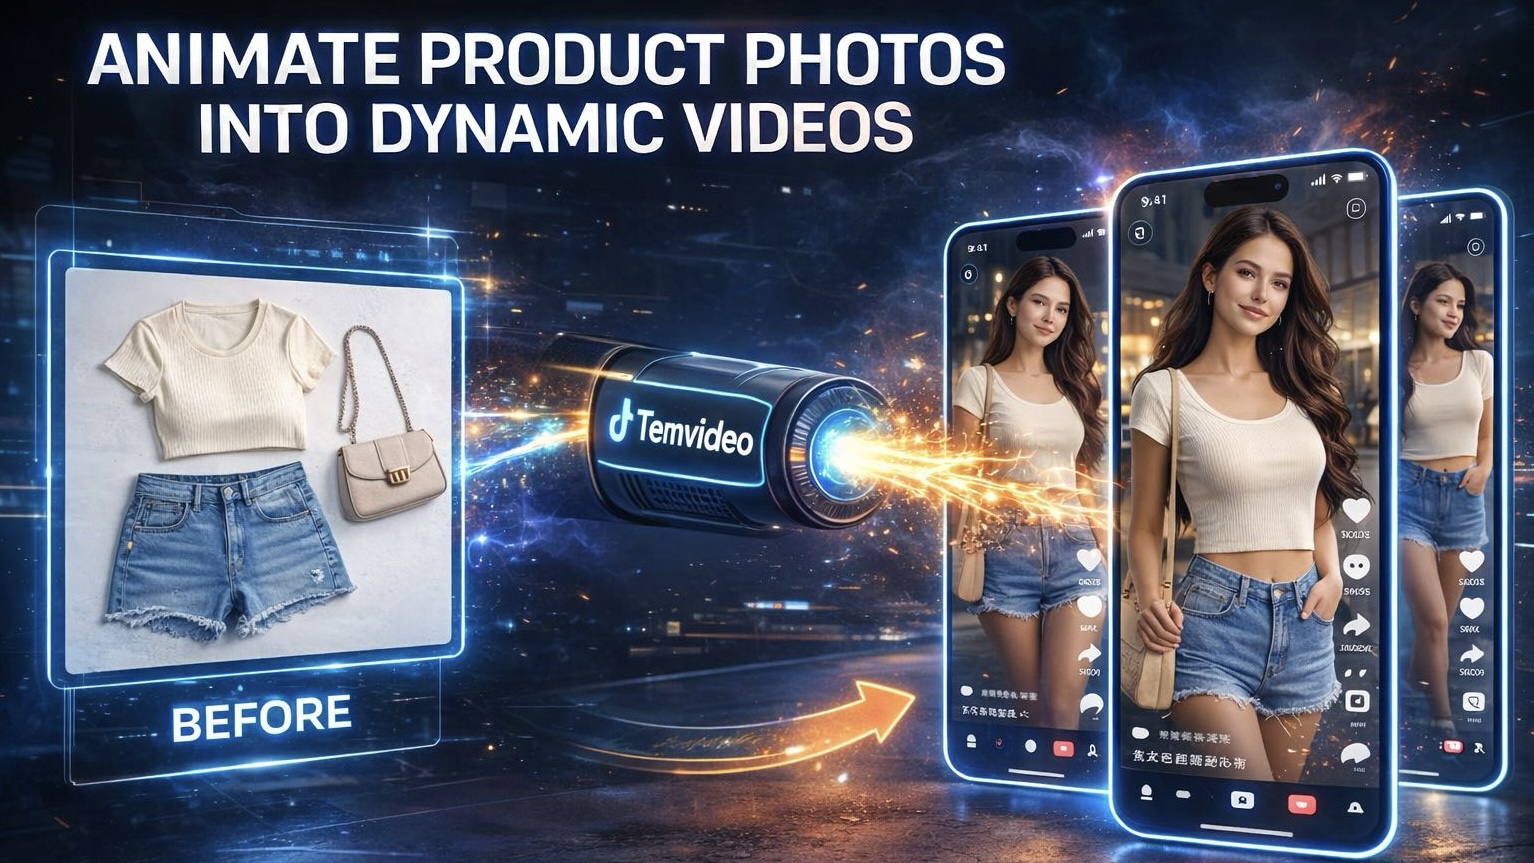
"The reference image shows three flat clothes. Please create a marketing video featuring a real person wearing clothes, highlighting their fashion and charm."
Best practices for writing prompts:
Mention atmosphere (luxury, casual, energetic)
Indicate camera style if needed (close-up, wide shot)
Clarify purpose (ad, social post, product demo)
Step 5: Click “Generate” and Wait
Once everything is set:
Click Generate
Wait a few minutes
The AI processes:
Scene matching
Model placement
Motion animation
Voiceover & subtitles
Background music synchronization
You’ll receive a fully animated marketing video — created from just one static image.
Step 6: Refine with the Built-in Editor (Optional)
If you want to fine-tune details:
Adjust subtitles
Replace background music
Modify pacing
Trim or extend scenes
Change text styles
Adjust voiceover timing
The built-in editor gives you full control for final polish.
From Static Image to High-Converting Video
The full workflow can be summarized as:
Choose path → Upload Image → Choose Category → Set Language & Duration → Enter Prompt → Generate → Edit (Optional)
In today’s attention economy, motion drives visibility.
A static image shows your product.
A dynamic video sells it.
Start transforming your product photos into powerful animated marketing assets today.
When your cut is ready, export to match platform expectations. Adobe’s guide to social safe‑zones is a handy reference for placement. For creative principles and recent ad specs on TikTok, review the TikTok Ads Help Center’s Creative best practices article. If your content also runs on Instagram Reels, Instagram’s business resources summarize Reels norms and eligibility considerations.
🚀 Ready to bring your static images to life?
👉 Try Temvideo for free today and see the difference.
Tags
Ready to get started?
Join TemVideo and start creating videos with thousands of creators
Start for Free